redis(三)集群
# redis安装
linux:https://redis.io/download
windows: https://github.com/MicrosoftArchive/redis/releases
远程工具:https://github.com/qishibo/AnotherRedisDesktopManager/releases
本文采用redis7.2.6版本搭建
# 主从复制
主从复制将redis服务器隔离开,一个主节点(master)用于写入,多个从节点(slave)只可读
新增conf文件:6380、6381、6382
复制以下文件内容,修改不为不同端口,不同日志文件
prot 6379
pidfile /var/run/redis_6380.pid
dbfilename dump6380.rdb
appendfilename "6380.aof"
################################## NETWORK #####################################
#绑定ip
#bind 127.0.0.1 ::1
#bind 0.0.0.0

#保护模式
protected-mode no

#端口设置6380
port 6380

#密码
requirepass "xcw1017!"

tcp-backlog 511

# 它可以决定一个空闲的客户端维持多少秒会关闭 0禁用
timeout 0

# 对访问客户端的一种心跳检测,每个n秒检测一次。单位为秒,如果设置为0,则不会进行Keepalive检测
tcp-keepalive 300

################################# GENERAL #####################################
# 以守护进程的方式运行,默认no
daemonize yes

# 如果以后台的方式运行,我们就需要指定一个pid文件!
pidfile /var/run/redis_6380.pid

# 指定服务器冗长级别.
# debug (大量的信息,对开发/测试很有用)
# verbose (许多很少有用的信息,但不像debug级别那样混乱)
# notice (稍微冗长一些,可能是您在生产环境中需要的)
# warning (只记录非常重要/关键的消息)
loglevel notice

# 指定日志文件名
logfile ""

# 数据库数量默认16个
databases 16

# 是否总显示logo
always-show-logo no

# 默认情况下,Redis 会修改进程标题(如“top”和“ps”所示)以提供一些运行时信息。 可以通过将以下设置为 no 来禁用它并使进程名称保持为已执行状态。
set-proc-title yes

#  更改进程标题时,Redis 使用以下模板来构造修改后的标题
#
# {title}           父进程执行的进程名称,或子进程的类型.
# {listen-addr}     绑定地址或 ‘*’ 后跟 TCP 或 TLS 端口侦听,或 Unix 套接字(如果可用)
# {server-mode}     特殊模式,即“[sentinel]”或“[cluster]”
# {port}            TCP 端口监听,或 0
# {tls-port}        TLS 端口监听,或 0
# {unixsocket}      监听的 Unix 域套接字,或 “”.
# {config-file}     使用的配置文件的名称.
#
proc-title-template "{title} {listen-addr} {server-mode}"

################################ 快照  ################################

# 持久化,将数据库保存到磁盘。AOF和RDB持久化实例.
save 3600 1
save 300 100
save 60 50
# save <seconds> <changes> [<seconds> <changes> ...]

# 可以使用单个空字符串参数完全禁用快照
# save ""

#   * 3600 秒(一小时)后,如果至少 1 个键发生了变化
# save 3600 1

#   * 300 秒(5 分钟)后,如果至少有 100 个键被更改
# save 300 100

#   * 60 秒后,如果至少有 10000 个键被更改
# save 60 10000


# 持久化出错如果出错,是否需要继续工作!
stop-writes-on-bgsave-error yes

# 是否压缩 rdb 文件,需要消耗一些 CPU 资源
rdbcompression yes

# 保存 rdb 文件,进行错误的检查检验!
rdbchecksum yes

# rdb文件名
dbfilename dump6380.rdb

# 删除非持久化实例中复制使用的RDB文件
rdb-del-sync-files no

# rdb 文件的保存目录
dir /opt/homebrew/etc/redis/db/

################################# 主从复制 #################################
# replicaof <masterip> <masterport>

# 如果主节点设置了密码,则设置访问主节点的密码
masterauth "xcw1017!"


# 用于配置链接主服务器的用户,默认用户无法运行PSYNC,最好提供一个特殊的用户。
# masteruser <username>

replica-serve-stale-data yes

# 主从时期,从库是否只读,默认yes(只读)。非只读可以存储一些临时数据(在主从同步时会覆盖存储的数据)
replica-read-only yes

# 主从数据复制同步策划:文件或套接字,默认为套接字传输数据
repl-diskless-sync yes

# 当启用无硬盘备份,服务器等待一段时间后才会通过套接字向从节点传送RDB文件,这个等待时间是可配置的。
# 一旦传输备份数据开始,主节点不会再接收新从节点的复制请求直到下一个rdb传输。
# 从节点节点徐要排队等待下一次RDB传送。因此服务器等待一段时间以期更多的从节点获取到连接。
# 延迟时间以秒为单位,默认为5秒。要关掉这一功能,只需将它设置为0秒,传送会立即启动
repl-diskless-sync-delay 5

# 当启用无硬盘备份,服务器等待一段时间后内,如果达到预期的最大副本连接数则可以直接开始传送
# 0 ~ 无限大 (正整数)。 默认 0
repl-diskless-sync-max-replicas 0

# RDB文件落在Slave磁盘上模式, 直接从socket获取rdb数据,是需要拿到完整的rdb数据才开始进行同步
# disable 不使用无硬盘方案
# on-empty-db 只有在完全安全才使用无硬盘
# swapdb 在解析socket的rdb数据时,将当前数据库的数据放到内存中,这样可以在复制的时候为客户端提供服务,但是可能会造成内存溢出
repl-diskless-load disabled

# 同步之后是否禁用从节点上的TCP_NODELAY。
# yes,redis会使用较少量的TCP包和带宽向从节点发送数据。但这可能会增加从节点的数据的延迟,Linux 内核使用默认最长40毫秒 。
# no,从节点的数据延时不会那么多,但备份需要的带宽相对较多。
# 默认情况下我们将潜在因素优化,但在高负载情况下或者在主从节点都跳的情况下,把它设置为yes更好。默认值为no。
repl-disable-tcp-nodelay no

# 从redis设置升级主节点的优先级,在主redis持续不正常工作的情况下,优先级高的redis会升级为主节点。
# 编号越小,优先级越高。当优先级设置为0,则永远不会被选中。默认的优先级为100。
replica-priority 100


################################## SECURITY ###################################

# ACL日志大小。ACL日志跟踪与ACL关联的失败命令和身份验证事件。ACL 日志存储在内存中。 在下面定义 ACL 日志的最大条目长度
acllog-max-len 128


lazyfree-lazy-eviction no
lazyfree-lazy-expire no
lazyfree-lazy-server-del no
replica-lazy-flush no

# It is also possible, for the case when to replace the user code DEL calls
# with UNLINK calls is not easy, to modify the default behavior of the DEL
# command to act exactly like UNLINK, using the following configuration
# directive:

lazyfree-lazy-user-del no

# FLUSHDB, FLUSHALL, SCRIPT FLUSH and FUNCTION FLUSH support both asynchronous and synchronous
# deletion, which can be controlled by passing the [SYNC|ASYNC] flags into the
# commands. When neither flag is passed, this directive will be used to determine
# if the data should be deleted asynchronously.

lazyfree-lazy-user-flush no

# 内存不足时杀死哪些进程
# no: 在所有其他进程之前先杀死后台子进程,并且在主进程之前杀死其他进程 《默认》。
# yes: 相对的。是 relative 选择的别名。
# absolute: 超过 oom-score-adj-values 值时内存泄漏。
# relative: 服务器启动,将值改为 -1000 ~ 1000 的范围内。
oom-score-adj no

# oom-score-adj设置absolute生效,此指令控制用于主进程、副本进程和后台子进程的特定值。数值范围为-2000到2000(越高意味着越有可能被杀死)
oom-score-adj-values 0 200 800


#################### KERNEL transparent hugepage CONTROL ######################

# 帮助用户检查和解决可能的数据查询延迟的数据。
disable-thp yes

############################## APPEND ONLY MODE  AOF持久化###############################

# 是否开启AOF持久化
appendonly yes

# 文件名称
appendfilename "6380.aof"

#aof文件目录
appenddirname "appendonlydir"

# 持久化同步策略
# everysec:每秒执行,发送异常时可能会丢失最后一秒的数据。
# always:每次写操作执行,数据最安全,但是对性能有影响。
# no:不强制刷盘,不主动同步数据,由内核决定什么时候刷盘,数据最不安全,性能最好。
appendfsync everysec

# 在重写时是否持久化aof文件。在aof重写或者写入rdb文件的时候,会执行大量IO,此时对于everysec和always的aof模式来说,
# 执行fsync会造成阻塞过长时间,所以设置no-appendfsync-on-rewrite为no。
# 如果对延迟要求很高的应用,这个字段可以设置为yes,否则设置为no,这样对持久化特性来说是更安全的选择。
# 设置为yes表示rewrite期间对新写操作不fsync,暂时存在内存中,等rewrite完成后再写入aof文件。
# Linux的默认fsync策略是30秒。默认值为no,可能丢失30秒内数据
no-appendfsync-on-rewrite no


# 自动重写AOF文件
# 在AOF文件大小增长到了指定的百分比(相对于上次AOF文件大小的增长量)或者指定的最小体积时,会自动调用BGREWRITEAOF命令重写AOF文件。
auto-aof-rewrite-percentage 100
auto-aof-rewrite-min-size 64mb

# AOF文件末尾截断时的处理策略。在服务意外中断是会导致aof文件的内存被截断(不完整),重启服务时时候加载aof文件。
# yes,即使文件发生了截断也要加载文件。
# no:如果AOF文件发生了截断,启动服务时会拒绝启动。
aof-load-truncated yes

# 开启混合持久化(使用aof持久化同时使用rdb存储数据)
aof-use-rdb-preamble yes

# Redis支持AOF中记录时间戳,支持特定时间点的恢复数据,但是可能会与现有的AOF解析器不兼容的方式更改AOF格式
aof-timestamp-enabled no

################################## SLOW LOG ###################################
# 慢日志记录阈值。命令执行时间超过这个值就会被记录到慢日志中,默认值是10000微秒。下面的时间用微秒表示,所以1000000相当于一秒
slowlog-log-slower-than 10000
# 慢日志文件大小。慢日志文件超过这个长度后最旧的记录会被删除,默认值是128条
slowlog-max-len 128

################################ LATENCY MONITOR ##############################
latency-monitor-threshold 0


############################# EVENT NOTIFICATION  事件通知管理##############################

# Redis 可以通知 Pub/Sub 客户端有关key缓存数据中发生的事件
notify-keyspace-events ""

############################### ADVANCED CONFIG ###############################

# 哈希在条目数量较少且最大条目不超过给定阈值时,哈希使用内存高效数据结构进行编码
hash-max-listpack-entries 512
hash-max-listpack-value 64

# 性能最高的选项通常是 -2(8 Kb 大小)或 -1(4 Kb 大小)
list-max-listpack-size -2

#
list-compress-depth 0

# 当集合(Set)仅由恰好是基数为10的64位有符号整数范围内的整数的字符串组成时,集合使用特殊编码
set-max-intset-entries 512

# 散列hash和列表list类似,排序集也经过特殊编码,以节省大量空间。此编码仅在排序集的长度和元素低于以下限制时使用
zset-max-listpack-entries 128
zset-max-listpack-value 64

# HyperLogLog sparse representation bytes limit. The limit includes the
# 16 bytes header. When an HyperLogLog using the sparse representation crosses
# this limit, it is converted into the dense representation.
#
# A value greater than 16000 is totally useless, since at that point the
# dense representation is more memory efficient.
#
# The suggested value is ~ 3000 in order to have the benefits of
# the space efficient encoding without slowing down too much PFADD,
# which is O(N) with the sparse encoding. The value can be raised to
# ~ 10000 when CPU is not a concern, but space is, and the data set is
# composed of many HyperLogLogs with cardinality in the 0 - 15000 range.
hll-sparse-max-bytes 3000

# 单位为 Byte,默认值 4096,用于设定每个宏节点占用的内存上限为 4096,0 表示无限制。
stream-node-max-bytes 4096
# 设定每个宏节点存储元素个数。
stream-node-max-entries 100

#
activerehashing yes

#
client-output-buffer-limit normal 0 0 0
client-output-buffer-limit replica 256mb 64mb 60
client-output-buffer-limit pubsub 32mb 8mb 60

# .
hz 10

# .
dynamic-hz yes

# 当重写AOF文件时,如果启用以下选项,则每生成4 MB的数据,就会对文件进行fsync。这对于更增量地将文件提交到磁盘并避免大的延迟峰值非常有用.
aof-rewrite-incremental-fsync yes

# 当redis保存RDB文件时,如果启用以下选项,则每生成4MB的数据就会对该文件进行fsync。这对于更增量地将文件提交到磁盘并避免大的延迟峰值非常有用
rdb-save-incremental-fsync yes
2
3
4
5
6
7
8
9
10
11
12
13
14
15
16
17
18
19
20
21
22
23
24
25
26
27
28
29
30
31
32
33
34
35
36
37
38
39
40
41
42
43
44
45
46
47
48
49
50
51
52
53
54
55
56
57
58
59
60
61
62
63
64
65
66
67
68
69
70
71
72
73
74
75
76
77
78
79
80
81
82
83
84
85
86
87
88
89
90
91
92
93
94
95
96
97
98
99
100
101
102
103
104
105
106
107
108
109
110
111
112
113
114
115
116
117
118
119
120
121
122
123
124
125
126
127
128
129
130
131
132
133
134
135
136
137
138
139
140
141
142
143
144
145
146
147
148
149
150
151
152
153
154
155
156
157
158
159
160
161
162
163
164
165
166
167
168
169
170
171
172
173
174
175
176
177
178
179
180
181
182
183
184
185
186
187
188
189
190
191
192
193
194
195
196
197
198
199
200
201
202
203
204
205
206
207
208
209
210
211
212
213
214
215
216
217
218
219
220
221
222
223
224
225
226
227
228
229
230
231
232
233
234
235
236
237
238
239
240
241
242
243
244
245
246
247
248
249
250
251
252
253
254
255
256
257
258
259
260
261
262
263
264
265
266
267
268
269
270
271
272
273
274
275
276
277
278
279
280
281
282
283
284
285
286
287
288
289
290
291
292
293
294
295
296
297
298
299
300
301
302
# 启动Redis服务
进入bin目录使用 redis-server启动
./redis-server /opt/homebrew/etc/redis/redis-sentinel/redis_6380.conf
./redis-server /opt/homebrew/etc/redis/redis-sentinel/redis_6381.conf
./redis-server /opt/homebrew/etc/redis/redis-sentinel/redis_6382.conf
2
3
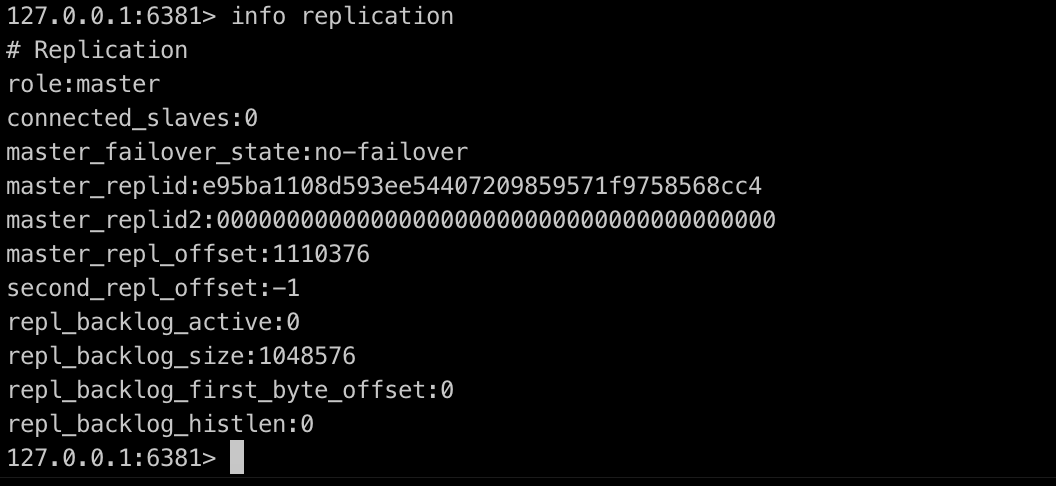
# 查看Redis信息
新版本使用 info replication查看主从信息
查看节点信息

# Sentinel哨兵模式搭建
哨兵模式是Redis的高可用解决方案,是由一个哨兵或多个哨兵组成,监听主节点,主节点故障后进行选举,选择新的主节点
conf配置文件:
redis-sentinel-16380.conf
redis-sentinel_16381.conf
redis-sentinel_16382.conf
# Example sentinel.conf   启动哨兵 redis-sentinel /opt/homebrew/etc/redis/redis-sentinel/redis-sentinel.conf
#保护模式
protected-mode no

# 哨兵端口
port 16381

# 是否以守护进程模式后台运行
daemonize yes

# 因为这里在同一台机器上运行多个实例,所以需要指定
pidfile "/var/run/redis-sentinel_16381.pid"

# 日志文件名
logfile "redis-sentinel_16381.log"

# 日志文件路径
dir "/opt/homebrew/etc/redis/log"

# sentinel monitor <master-name> <ip> <redis-port> <quorum>
# 哨兵监听的主服务器 主机挂掉以后进行投票,只需要2票就可以从机变主机
sentinel monitor mymaster 127.0.0.1 6381 2

##当在Redis实例中开启了requirepass,这里就需要提供密码。
sentinel auth-pass mymaster xcw1017!

# 设置未得到主机响应时间,此处代表5秒未响应视为宕机
sentinel down-after-milliseconds mymaster 5000

# 故障转移的超时时间failover-timeout,设置一分钟,可以用在以下这些方面:
## 1. 同一个sentinel对同一个master两次failover之间的间隔时间。
## 2. 当一个slave从一个错误的master那里同步数据时开始,直到slave被纠正为从正确的master那里同步数据时结束。
## 3. 当想要取消一个正在进行的failover时所需要的时间。
## 4.当进行failover时,配置所有slaves指向新的master所需的最大时间。不过,即使过了这个超时,slaves依然会被正确配置为指向master,但是就不按parallel-syncs所配置的规则来同步数据了
# sentinel failover-timeout <master-name> <milliseconds>
sentinel failover-timeout mymaster 60000

# 配置当某一事件发生时所需要执行的脚本
# sentinel notification-script <master-name> <script-path>
2
3
4
5
6
7
8
9
10
11
12
13
14
15
16
17
18
19
20
21
22
23
24
25
26
27
28
29
30
31
32
33
34
35
36
37
38
39
40
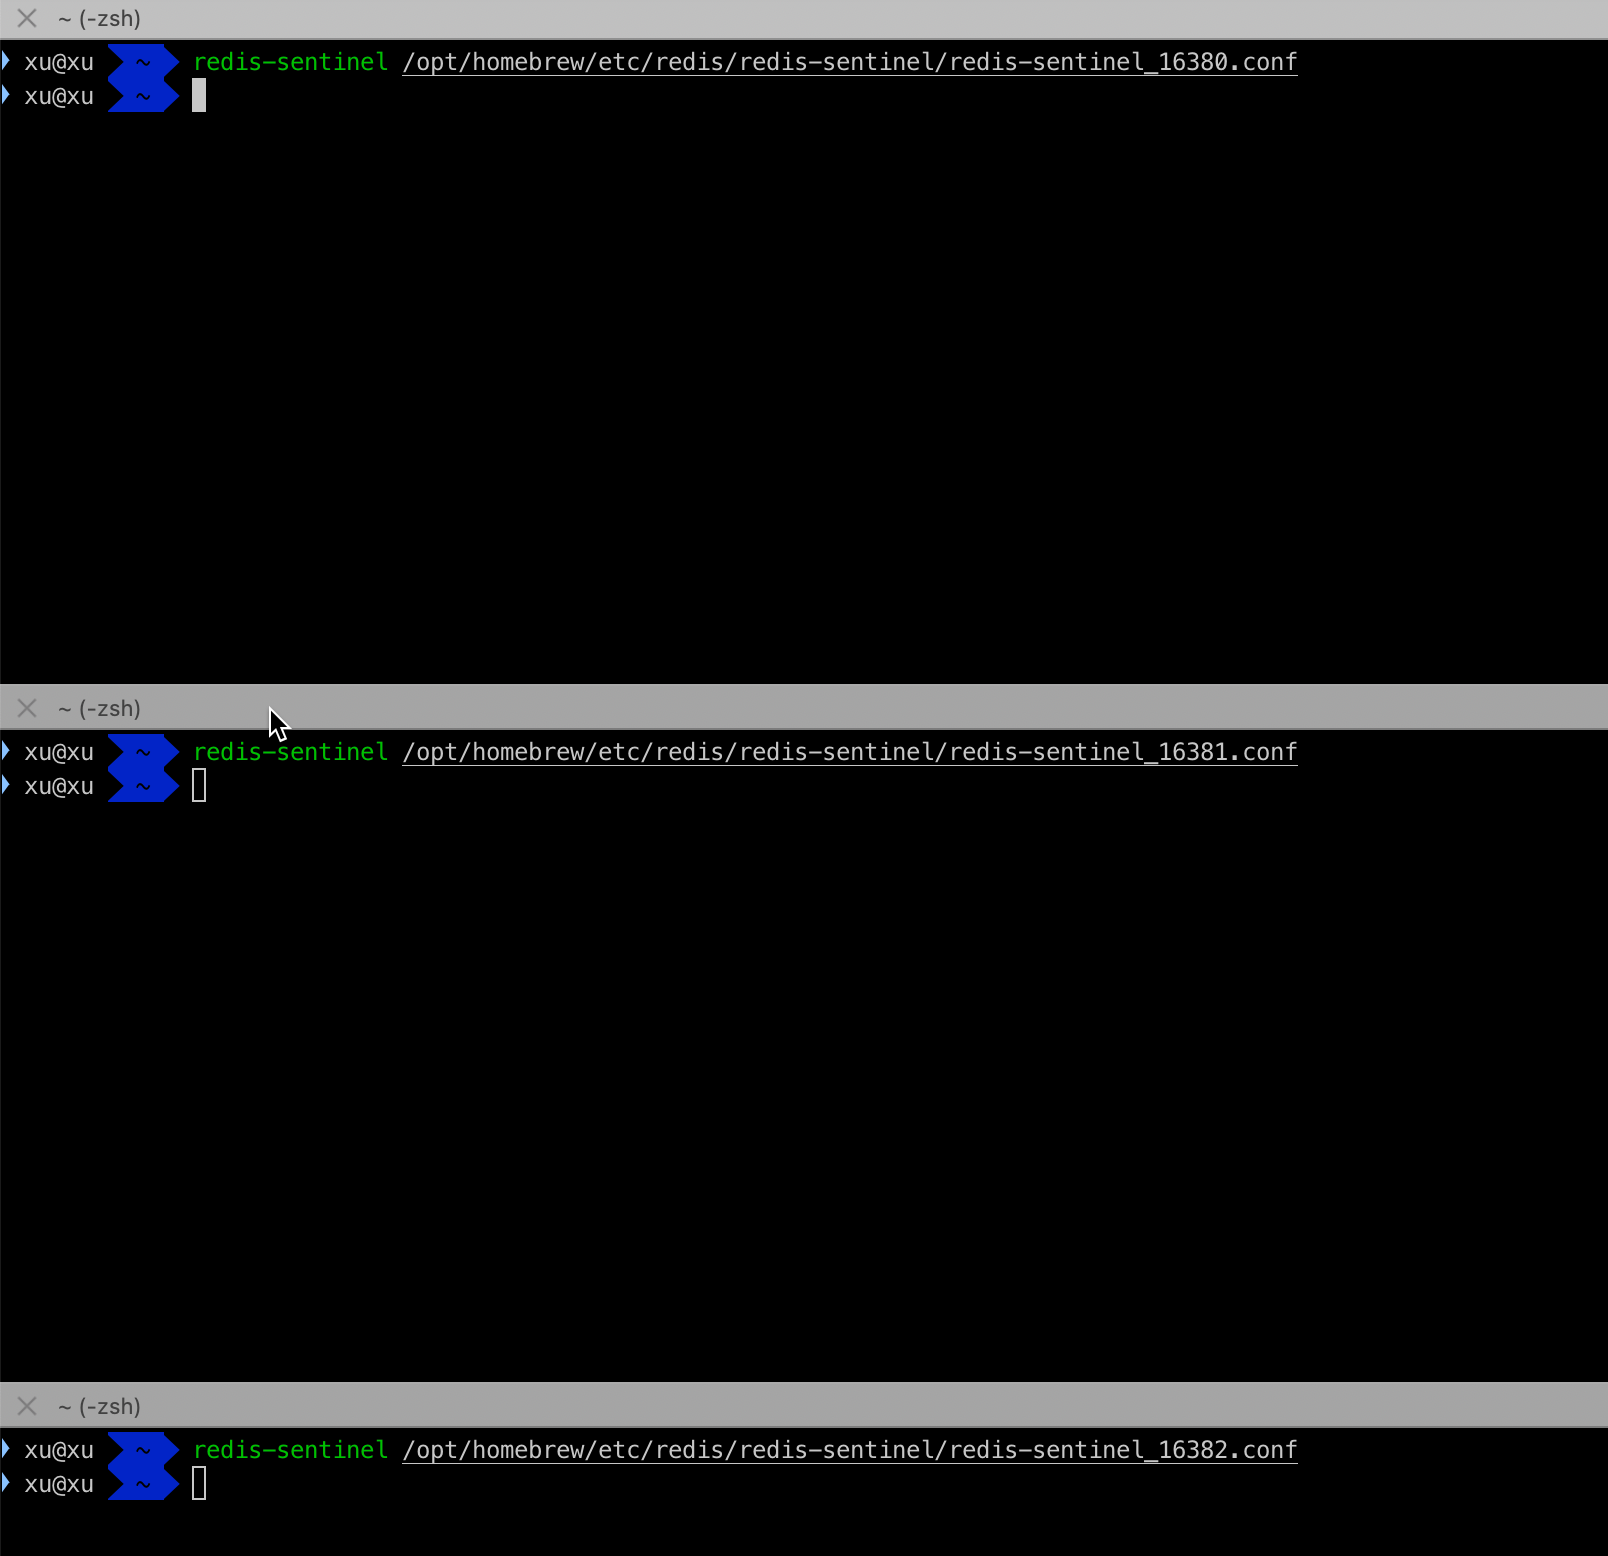
# 依次启动哨兵
redis-sentinel /opt/homebrew/etc/redis/redis-sentinel/redis-sentinel_16380.conf
redis-sentinel /opt/homebrew/etc/redis/redis-sentinel/redis-sentinel_16381.conf
redis-sentinel /opt/homebrew/etc/redis/redis-sentinel/redis-sentinel_16382.conf
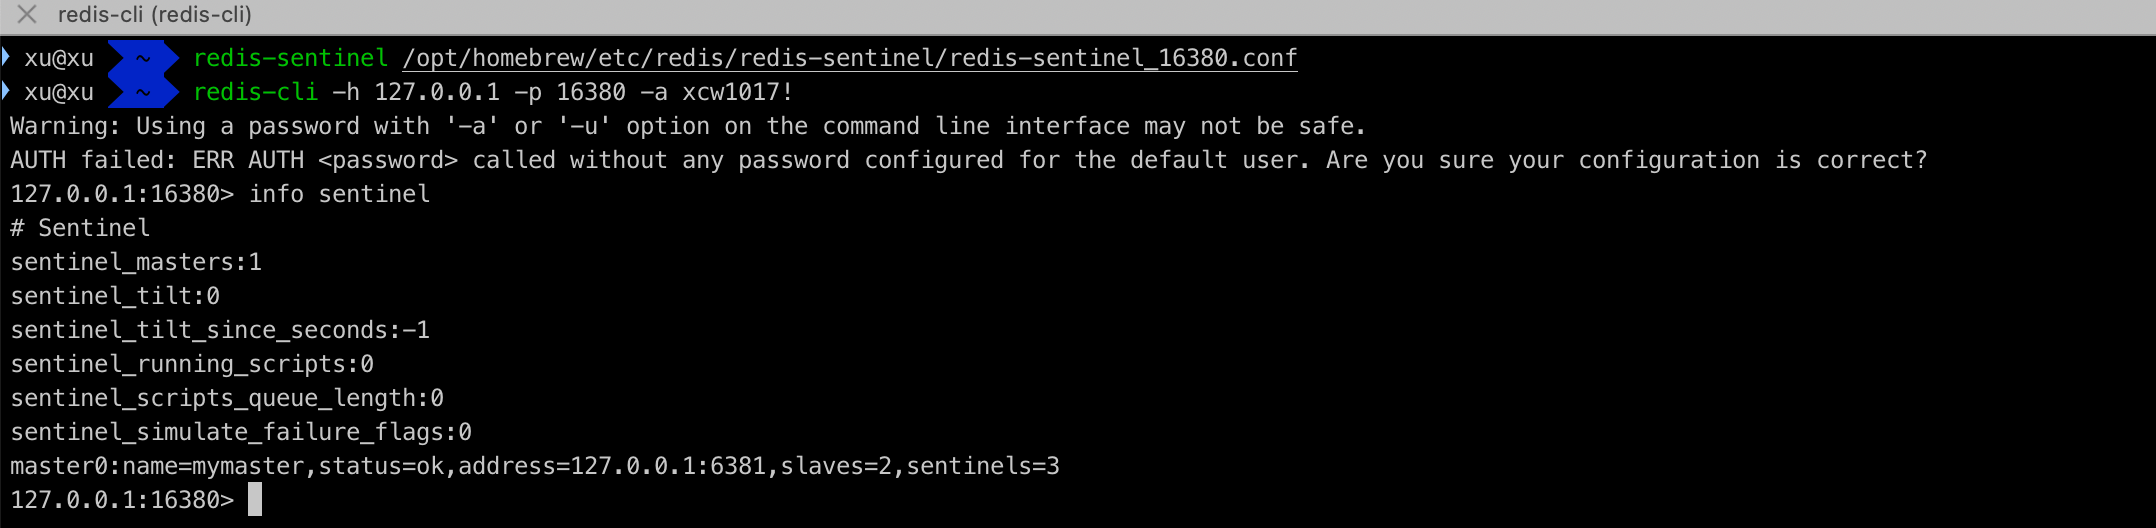
# 查看哨兵信息
执行info sentinel 查看哨兵信息,主节点为 127.0.0.1:6381 从节点2个,哨兵三个