Centos7安装Git和Maven
安装环境:
Centos7
git-2.29.2
mven-3.6.1
安装git有两种方法,yum安装的版本比较旧
# 一、yum安装git
输入命令即可完成安装
yum -y install git
查看git版本
git --version
# 二、GitHub下载指定版本
进入git在GitHub上发布版本页面https://github.com/git/git/releases,这个页面我们可以找到所有git已发布的版本。这里我们选择最新版的
tar.gz包解压压缩包
tar -zxvf git-2.29.2.tar.gz进入到解压后的文件夹
cd git-2.29.21拿到解压后的源码以后我们需要编译源码了,不过在此之前需要安装编译所需要的依赖。
yum install curl-devel expat-devel gettext-devel openssl-devel zlib-devel gcc perl-ExtUtils-MakeMaker1
2中途出现提示时,按y
安装编译源码所需依赖的时候,yum自动安装了git,这时候你需要先卸载这个旧版的git。
yum -y remove git1编译git源码
make prefix=/usr/local/git all1安装git至
/usr/local/git路径make prefix=/usr/local/git install1配置环境变量
vi /etc/profile1底部添加
export PATH=$PATH:/usr/local/git/bin1刷新环境变量
source /etc/profile1查看Git是否安装成功
git --version1
# 三、安装maven
Binary表示已经编译好的(推荐)
Source表示未编译的
官网下载maven版本
下载地址:http://maven.apache.org/download.cgi各个版本下载:https://archive.apache.org/dist/maven/maven-3/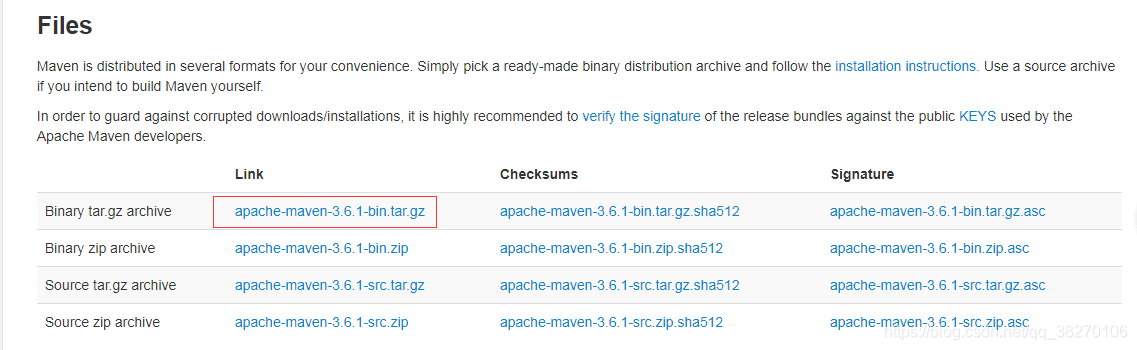
上传到linux的/usr/local目录,创建maven目录
解压文件到/usr/local/maven/下
tar -zxvf apache-maven-3.6.1-bin.tar.gz1配置环境变量
vi /etc/profile1底部输入
export PATH=$PATH:/usr/local/maven/maven-3.6.1/bin1刷新环境变量
source /etc/profile1查看版本
mvn -v1
注意:安装好maven后修改 配置文件/usr/local/maven/maven-3.6.1/conf/setting.xml 指定jar包的仓库地址
配置仓库地址
<localRepository>/usr/local/maven/repo</localRepository>1因为国外的服务器下载jar包很慢所以我们改为阿里云服务器
 <!-- 阿里云仓库 -->
 <mirror>
     <id>alimaven</id>
     <mirrorOf>central</mirrorOf>
     <name>aliyun maven</name>
     <url>http://maven.aliyun.com/nexus/content/repositories/central/</url>
 </mirror>
1
2
3
4
5
6
7配置jdk在profiles标签中(我使用的jdk1.8)
<!-- java版本 -->
<profile>
      <id>jdk-1.8</id>
      <activation>
	    <activeByDefault>true</activeByDefault>
        <jdk>1.8</jdk>
      </activation>

      <properties>
        <maven.compiler.source>1.8</maven.compiler.source>
		<maven.compiler.target>1.8</maven.compiler.target>
		<maven.compiler.compilerVersion>1.8</maven.compiler.compilerVersion>
      </properties>
</profile>
1
2
3
4
5
6
7
8
9
10
11
12
13
14配置完成,在命令行输入mvn help:system测试,看到下载链接里面是ailiyun的链接表示配置成功
此命令下载maven所需的配置及jar包